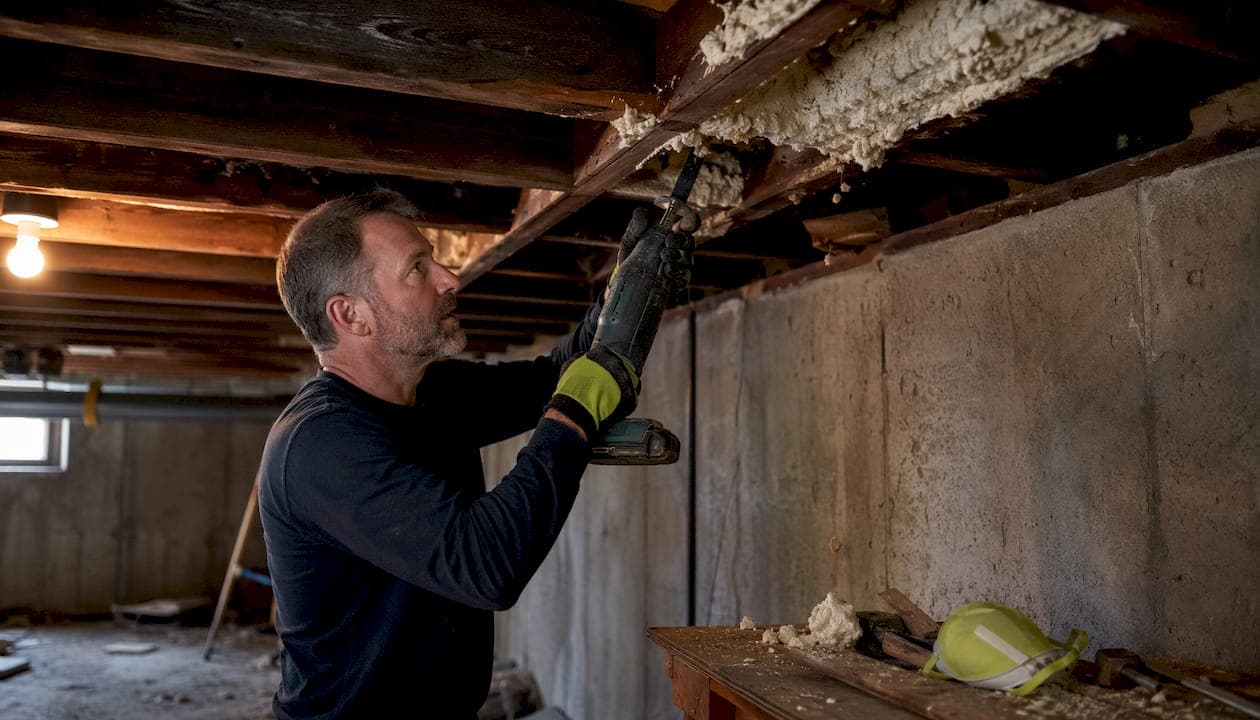
You can remove small, accessible patches of cured closed-cell spray foam yourself — but anything beyond a minor patch almost always warrants a specialist. The foam is rigid and densely bonded to roof timbers, rafters, and underlays, making full removal a mechanical demolition job rather than a simple cleanup. If you're facing extensive coverage, any sign of trapped moisture, or a property sale that requires documented inspection, stop reading the DIY section and book a free inspection first.
Your next-hour checklist:
- Inspect the area visually. Measure the coverage and note whether foam is bonded directly to rafters, roof felt, or structural timbers.
- Stop immediately if you see wiring, pipes, mold, or wet timber anywhere near the foam.
- Take clear photos from multiple angles — you'll need these for any professional quote.
- If the job is larger than a few square feet, or if you're selling or remortgaging, check whether you need removal before touching anything.
Table of Contents
- What makes closed cell foam removal so much harder than open cell?
- Safety and PPE: what you must have before you start
- What tools do you actually need?
- How to remove closed cell foam: step-by-step for small patches
- How to handle closed cell foam disposal safely and legally
- When should you call a professional instead of doing it yourself?
- What does closed cell foam removal cost, and how long does it take?
- What to check after removal, and what comes next for insulation
- Why closed cell removal is a forensic job, not just a cleanup
- Key Takeaways
- The case for defaulting to caution
- Sprayfoamremovalhelp: certified removal, done right the first time
What makes closed cell foam removal so much harder than open cell?
Closed-cell spray polyurethane foam (SPF) cures into a rigid, high-density material — roughly 2 pounds per cubic foot — that bonds aggressively to every surface it contacts. Open-cell foam is soft and spongy; you can cut it with a bread knife. Closed-cell foam requires power tools, patience, and a plan.
The density difference matters for another reason: closed-cell foam forms an impermeable shell that prevents roof assemblies from drying naturally. Moisture trapped beneath the foam can cause concealed rot and mold that stays completely invisible until the foam comes off. What looks like a straightforward insulation removal often turns into a structural assessment the moment the first section is peeled back.
Chemical solvents don't solve this. Acetone and similar products can soften uncured foam, but cured closed-cell material resists dissolution — solvents tend to create sticky, hard-to-manage residues rather than clean removal. Mechanical cutting and scraping is the only reliable method for fully cured foam.
Safety and PPE: what you must have before you start
Closed-cell foam removal generates fine particulate dust, chemical residues, and potential exposure to mold or microbial spores hidden beneath the foam. Skipping proper protection is not a calculated risk — it's a health hazard.
Hazards to know:
- Fine foam dust and fiberglass particulate from cutting and scraping
- Chemical residues from the original foam application and any solvents used during cleanup
- Trapped mold or microbial spores released when the foam seal is broken
- Hidden sharp objects, live wiring, and pressurized pipes concealed within or behind the foam
PPE checklist — non-negotiable:
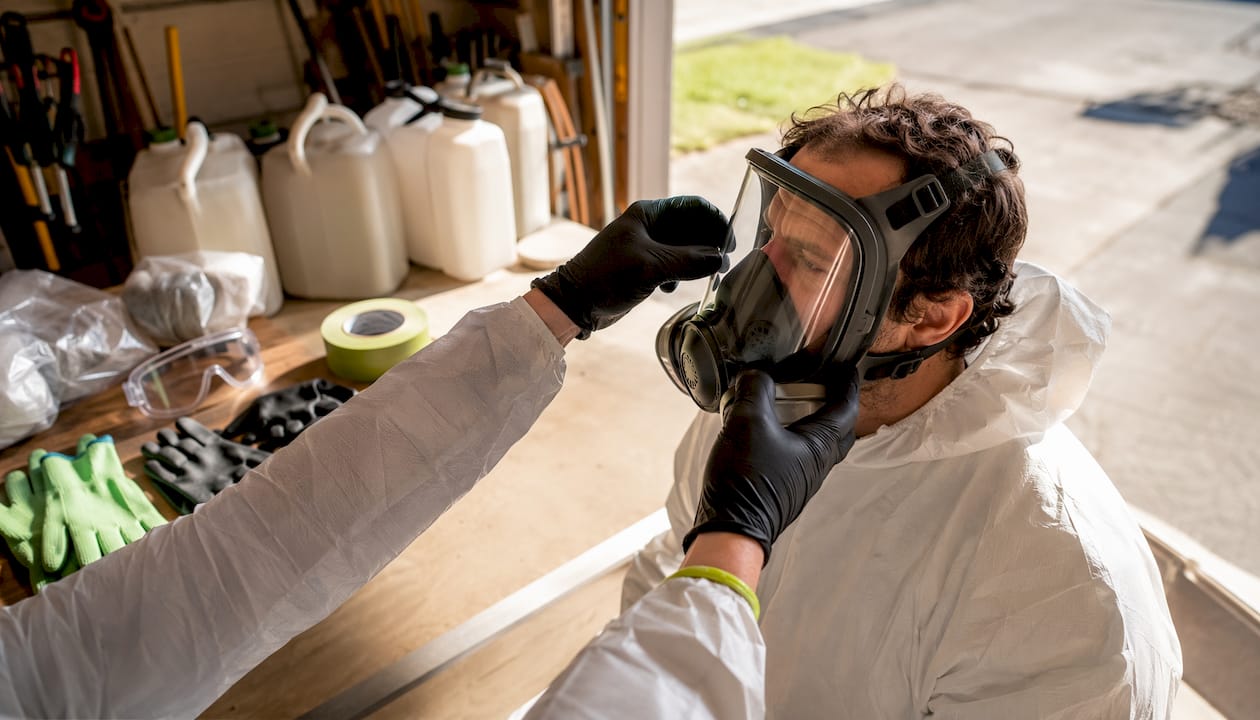
- NIOSH-rated P100 half-mask respirator (not a dust mask — foam particulate is fine enough to pass through standard paper masks)
- Safety glasses or goggles with side shields
- Nitrile gloves (chemical-resistant, not latex)
- Disposable coveralls or dedicated work clothes you can bag immediately after
- Knee pads for loft work
- Hearing protection when using reciprocating saws or oscillating tools
Containment and ventilation are equally critical. Best practice calls for isolating the workspace with plastic sheeting, running negative air pressure with a HEPA-filtered machine, and sealing off any HVAC ducts in the area to prevent foam dust from spreading through the house. Never sweep foam debris — sweeping aerosolizes fine particles. Use a HEPA vacuum only.
SDS caution: if you plan to use acetone, lacquer thinner, or a commercial foam remover, download the Safety Data Sheet for that product before opening the container. SDS documents list flash points, ventilation requirements, and first-aid procedures. Many of these solvents are highly flammable and require cross-ventilation and no open flames nearby.
Pro Tip: Before cutting anything, run a digital stud and wire scanner across the entire work area. A reciprocating saw blade through a live wire is an emergency, not an inconvenience. Scan, mark, and double-check before the first cut.
What tools do you actually need?
Separate your shopping list into two categories: safety gear you should buy and own, and power tools you can rent for a single job.
Buy outright:
- P100 half-mask respirator and spare filter cartridges
- Safety glasses, nitrile gloves, disposable coveralls
- Utility knife with a supply of fresh blades
- Putty scrapers and a stiff-bristled wire brush
- Heavy-duty contractor trash bags (3-mil minimum)
- Plastic sheeting and painter's tape for containment
- Digital wall scanner
Rent or borrow:
- Reciprocating saw (Sawzall-style) with non-toothed blade technique for cutting near timbers without snagging wiring
- Oscillating multi-tool for precision cuts in corners and around obstacles
- Powered hand scraper for residue after bulk foam is removed
- HEPA vacuum or negative-air machine (rental centers and tool-hire shops carry these)
Regulated guidance on mechanical SPF removal specifically recommends reciprocating saws, spud bars, and electric scrapers for medium-to-high-density closed-cell foam. Circular saws can handle bulk cuts on exposed sections, but they generate more airborne debris and require extra containment.
On solvents: keep acetone or mineral spirits on hand only for residue cleanup, not bulk removal. Store them in their original containers, away from heat sources, and check the SDS before use. Commercial foam removers containing d-limonene or methylene chloride are options for stubborn adhesive residue, but they can damage substrates if left on too long. Use sparingly and rinse promptly.
How to remove closed cell foam: step-by-step for small patches
This workflow is designed for accessible patches of a few square feet — think a small section of a loft rafter or a localized area around a pipe penetration. For anything larger, the risk-to-reward calculation shifts toward professional removal.
Pre-checks before you touch the foam:
- Run the digital scanner across the full work area and mark any wiring or pipes with tape.
- Photograph the foam coverage from multiple angles.
- Set up plastic sheeting containment and seal off any vents or ducts.
- Put on all PPE before cutting begins.
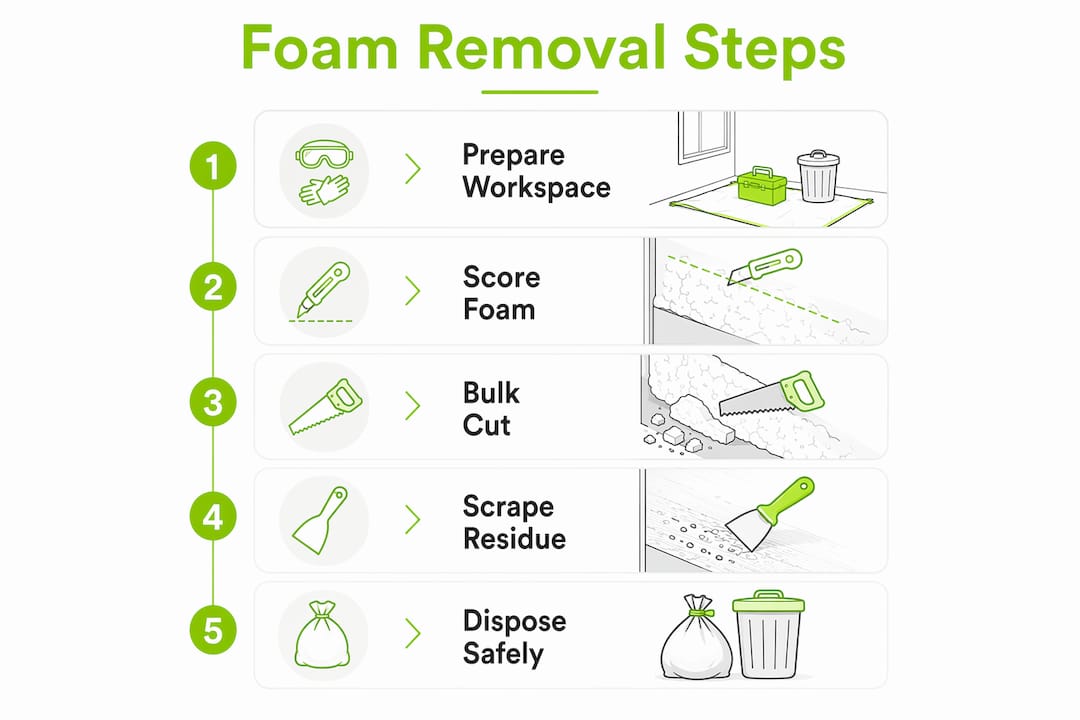
Step 1: Create an access margin
Score the perimeter of the section you're removing with a utility knife, making shallow passes rather than one deep cut. This prevents the blade from catching on hidden mechanicals and gives you a clean edge to work from. Keep cuts to 1–2 inches deep on the first pass.
Step 2: Bulk removal
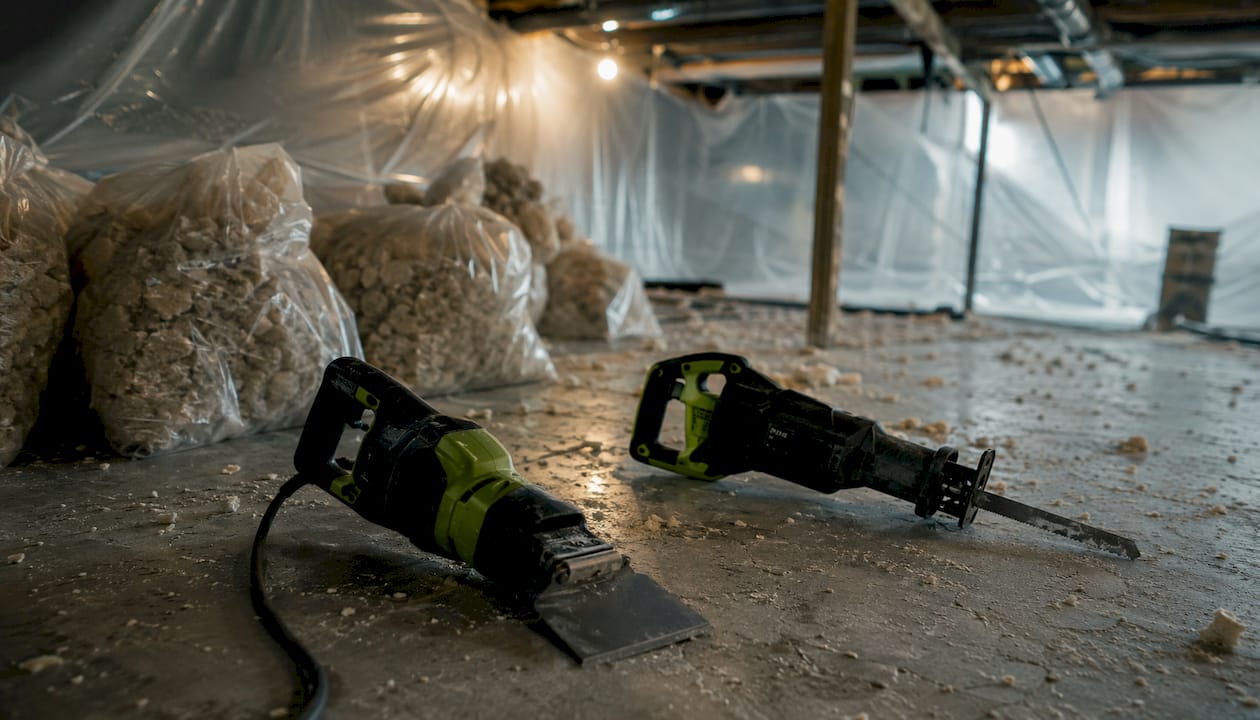
Use the reciprocating saw to cut through the foam in manageable sections — roughly 12-by-12-inch blocks. Use the non-toothed side of the blade when working close to timber to reduce the risk of splintering rafters or snagging wires. Switch to the oscillating multi-tool for corners, edges, and anywhere the saw can't reach cleanly. Work slowly. Closed-cell foam at full density resists cutting far more than it looks like it should.
Step 3: Scraping and residue cleanup
Once bulk foam is removed, a layer of adhesive residue will remain on the timber or substrate. A powered scraper handles most of this. For stubborn spots, apply a small amount of acetone on a rag, let it sit for 60 seconds, and scrape gently. Avoid soaking the timber — prolonged solvent contact can raise the grain and damage the wood surface. HEPA vacuum the area thoroughly after each scraping pass.
Step 4: Containment and interim moisture check
Double-bag all foam debris in contractor bags as you go. Seal each bag before moving it. Before you close up the containment area, press a moisture meter against the exposed timber. A reading above 20% moisture content in wood is a stop condition — wet timber means trapped moisture was present, and the job has moved beyond DIY territory.
Stop conditions — call a professional if you find:
- Wet or discolored timber (moisture meter above 20%, or visible staining)
- Visible mold growth or a musty smell once foam is removed
- Wiring or pipes that were not detected by the scanner
- Roof felt that is torn, brittle, or saturated
- Structural damage or cracked rafters
A note on the statistic callout: No verified industry-wide figure exists for the percentage of DIY closed-cell removals that uncover hidden moisture damage. Rather than cite an invented number, the honest guidance is this: concealed moisture is common enough that every professional remover treats it as the expected finding, not the exception. Plan for it.
How to handle closed cell foam disposal safely and legally
Cured polyurethane foam is not recyclable through standard curbside programs. Once it's bonded to wood or other substrates, separating the materials cleanly enough for recycling is generally not possible, and the foam itself goes to landfill in most jurisdictions.
Containment best practice:
- Double-bag all debris in heavy-duty contractor bags and seal with tape before moving them.
- Minimize fragmentation during cutting — smaller pieces mean more airborne particulate.
- Never shred foam in the open air or use a grinder without full containment and HEPA filtration.
Disposal options:
- Municipal bulky-waste or construction debris drop-off (call your local facility first — some accept bagged foam, others do not).
- Licensed construction and demolition waste haulers, who can take mixed debris including foam.
- Contractor pickup, if you've hired a professional for part of the job — confirm disposal is included in the scope.
Solvent disposal is separate. Acetone, mineral spirits, and commercial foam removers are typically classified as hazardous household waste. Do not pour them down the drain or into regular trash. Check your municipality's hazardous-waste collection schedule or drop-off location.
Transport: secure all bags in your vehicle so they can't shift or open in transit. Label bags clearly if a contractor is picking them up. Overfilling a bag is a common mistake — a torn bag in a vehicle spreads foam dust everywhere.
After debris is removed, HEPA vacuum all exposed surfaces and wipe down with a damp cloth. If you suspect mold was present beneath the foam, consider professional post-removal air quality testing before reoccupying the space.
When should you call a professional instead of doing it yourself?
Most homeowners underestimate how quickly a small removal job escalates. The foam itself is manageable in small quantities. The problems hiding beneath it are not.
Red flags that require a professional:
- Foam covers more than a few square feet of rafters or roof sheathing continuously.
- You can see or smell mold, or the timber looks discolored or soft.
- The foam is bonded directly to roof felt or membrane, and the felt appears fragile.
- You're selling the property or remortgaging — lenders often require a documented post-removal inspection, and removal without certification can leave you with the same mortgage problem you started with.
- Hidden wiring or pipes are present and you cannot confidently locate all of them.
- There is any structural concern — cracked rafters, sagging roof sections, or previous water damage.
What a legitimate contractor will provide:
- A pre-removal site survey and moisture assessment
- Written scope of work with contingency pricing for hidden damage
- Documented post-removal inspection, including moisture readings and photos
- Mortgage-compliant certification where required for sale or remortgage (see spray foam mortgage guidance)
- Proof of insurance and a written warranty
Questions to ask any contractor:
- What mechanical techniques do you use, and do you offer cryogenic (dry-ice blasting) removal for delicate substrates?
- How do you protect roof felt and timbers during cutting?
- What does your post-removal inspection include, and will it satisfy a lender's surveyor?
- What is your insurance coverage, and do you offer a warranty on the work?
- Is disposal included in the quoted price?
For urgent situations, emergency removal services are available when a sale or survey is time-sensitive.
What does closed cell foam removal cost, and how long does it take?
There is no single price for foam insulation removal. Cost depends on too many site-specific variables for any published figure to be reliable without an on-site survey.
Primary cost drivers:
- Foam density and thickness (closed-cell costs more to remove than open-cell)
- Total square footage covered
- Accessibility — a tight loft with low headroom takes significantly longer than an open attic
- Presence of trapped moisture, rot, or mold (remediation adds scope and cost)
- Disposal and containment requirements
- Whether a post-removal inspection certificate is needed for sale or remortgage
Realistic timelines:
- Small patch (a few square feet): a few hours for a competent DIYer, or a half-day professional visit
- Partial loft or localized section: 1–2 working days
- Full closed-cell removal across an average home: 3–5 working days or more, depending on house size and condition
These are examples, not guarantees. Regional labor rates, disposal costs, and the condition of the structure all shift the final number.
Getting an accurate quote — what to request:
- An on-site survey, not a phone estimate
- An itemized scope that separates removal, disposal, remediation, and inspection costs
- Contingency pricing for hidden damage discovered during removal
- Confirmation that disposal is included
- A clear statement of what post-removal documentation will be provided
Use this quote guide to understand what a well-structured quote should include before comparing bids.
What to check after removal, and what comes next for insulation
The moment the foam comes off, you have a window to inspect the structure properly. Use it.
Post-removal checks:
- Moisture meter readings on every exposed timber — log the readings and photograph the meter against the wood.
- Full visual inspection of rafters, joists, and roof sheathing for rot, staining, or soft spots.
- Roof felt or membrane check — look for tears, brittleness, or saturation.
- Document everything with dated photos before any remediation or reinsulation begins.
When remediation is needed: rotten or structurally compromised timbers must be replaced or sistered before reinsulation. Damaged felt should be replaced. Any mold-affected surfaces need targeted treatment — not just a coat of paint.
Reinsulation options: once the structure is dry, repaired, and inspected, you have several practical choices. Mineral wool batts between rafters or on the loft floor are the most common replacement, offering good thermal performance and breathability. Rigid insulation board works well for specific applications. Multifoil products like Superfoil are an option where space is limited. The key is matching the insulation type to the building's construction and ventilation strategy — a breathable structure needs a breathable insulation system.
Sequencing matters: dry the structure first, make repairs, treat any mold, then reinsulate. Rushing to reinsulate over damp timber repeats the original problem. A certified inspection at the end of this sequence gives lenders and future buyers confidence that the structure is sound.
Why closed cell removal is a forensic job, not just a cleanup
Professionals who specialize in this work describe closed-cell foam removal as a forensic investigation as much as a demolition task. The foam is the symptom; what's underneath is the finding.
Closed-cell foam can form an impermeable shell that prevents roof assemblies from drying, increasing the risk of concealed decay that remains invisible until the foam is removed. Removal commonly transitions a job into a structural and drying project rather than a simple cleanup — and documentation of what was found, and what was done about it, is what lenders and surveyors actually need to see.
Practitioners use digital scanners to locate hidden services before cutting, work section by section to preserve roof structure, and use precision techniques — including cryogenic dry-ice blasting for delicate substrates — to avoid damaging timbers or felt. The mechanical-first approach is standard because chemical removers are largely ineffective on fully cured, high-density closed-cell foam and can damage the very surfaces you're trying to preserve.
Why documentation matters beyond the job itself:
- Lenders and surveyors treat foam-covered roof structures as higher risk. Removal alone does not resolve this.
- A post-removal inspection certificate, with moisture readings and a written structural assessment, is what restores lender confidence.
- Removal without documentation can leave a homeowner unable to sell or remortgage — the same position they were in before the work started.
- Pre- and post-removal photos, moisture logs, and a written scope for any repairs form the paper trail that protects your investment.
If your property will be sold or refinanced, a spray foam removal certificate is not optional — it's the deliverable that makes the removal commercially meaningful.
Key Takeaways
Closed-cell foam removal is a mechanical, safety-critical job: small patches are manageable for a prepared homeowner, but full removal almost always requires professional tools, containment, and documented inspection.
| Point | Details |
|---|---|
| DIY scope is narrow | Limit DIY attempts to small, accessible patches; stop immediately if you find wet timber, mold, or hidden mechanicals. |
| PPE is mandatory | A NIOSH P100 half-mask respirator, nitrile gloves, coveralls, and HEPA vacuum are required before any cutting begins. |
| Full removal takes several days | A full closed-cell removal across an average home typically takes several working days; small patches take a few hours. |
| Documentation protects your sale | Removal without a post-removal inspection certificate often leaves mortgage and sale problems unresolved. |
| Sprayfoamremovalhelp | Offers certified, mortgage-compliant removal with a 10-year insurance-backed warranty — book a free inspection to get started. |
The case for defaulting to caution
Most homeowners who contact us have already tried to assess the job themselves and realized it's bigger than it looked. That's the honest pattern with closed-cell foam. The surface you can see is rarely the whole story.
The argument for professional removal isn't just about having the right tools — though the tools matter. It's about what happens after the foam comes off. A certified technician doesn't just remove the material; they document what was found, test the structure, and produce the paperwork that lenders and surveyors actually accept. That documentation is what converts a removal job into a resolved problem for your property's future.
For anything beyond a small, low-risk patch, the apparent savings from DIY tend to evaporate when hidden moisture is found, remediation is needed, and a certified inspection is required anyway. The cost of doing it twice — once yourself, once professionally — almost always exceeds the cost of doing it right the first time.
If you're unsure whether your situation qualifies as a small patch or a full removal, the honest answer is to get a survey before deciding. That's not a sales pitch — it's the same advice any experienced contractor would give.
Sprayfoamremovalhelp: certified removal, done right the first time

Sprayfoamremovalhelp is the direct-service alternative to guessing whether your foam removal is a DIY job or a professional one. Our PCA-certified technicians handle the full scope: mechanical removal, moisture testing, structural documentation, and mortgage-compliant inspection certificates — all delivered by the in-house team doing the actual work, with no middlemen and no hidden fees.
Over 1,000 homeowners have trusted us with removals across London and the Southeast. Every job comes with a 10-year insurance-backed warranty and a written post-removal report that satisfies lenders and surveyors. If you're facing a sale, a remortgage, or simply foam you need gone safely, see how we remove spray foam and then book your free inspection to get a no-pressure, on-site assessment and an honest quote.